
Leather Working Toolkit under $100

Leatherworking can be quite daunting as the tools are unusual and it can be hard to work out what you actually need.
You can buy one of those premade toolkits from temu but they come with a lot of tools you don’t need. You are better off buying the tools one by one off a reputable Aussie store like Birdsalls (or temu).
If you wish to buy individual tools below is a list of the basic ones I would recommend starting with.
(Please note, this is a list of tools I have curated to help beginners, Please do your own research to find the tools you think are best as I do not take any responsibility if you choose to buy them as they are not mine.)
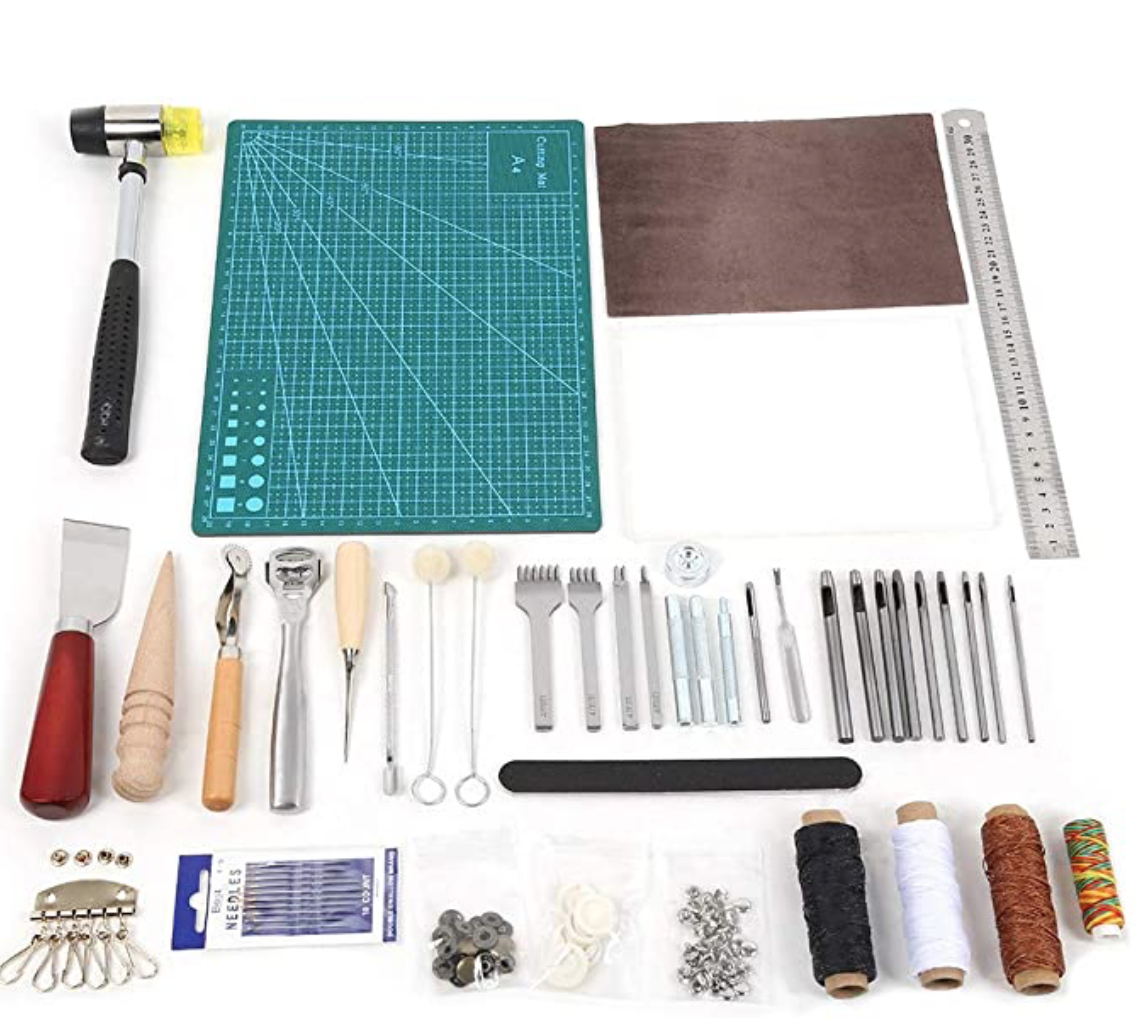
Premade Kit: $80
You may have seen a kit like this before on ebay, temu or aliexpress. they are definitely the cheapest way to get into leather work but there are a number of things I don’t like about them.
small cutting mat
no Stanley knife
I don’t like those needles
pricking wheel isn’t adjustable
I prefer the 6mm stitching chisel not the 3mm one they provide
You get the idea, you can make them work for you but if you are okay with spending a little more money then buying the tools on by one is the way to go.
Individual Tools
1: Cutting Tools.

Cutting Mat: $16
The cutting mat doesn’t have to be this one or even look like this one but having a self healing mat with a grid will make your life easier and save your table.
Although buying all these tools under $100 will mean you can only get the small one. If you have the money Buy the biggest one you can afford and have the space for.

Stanley knife: $19
A knife like this will probably be your most used tool and while you can buy a cheap $2 Stanley knife, paying a bit more will mean it will last longer. My one is from OLFA and although its plastic it has a solid feel and I love it! My one (pictured) is over 6 years old as I got it second hand.

Japanese skiving knife: $12
The link above isn’t for this exact knife, but it works the same. I don’t use it as often as my Stanley knife as I forget to sharpen it, but it is super handy for cutting strap ends and corners where you can press the straight edge down to get a straight cut every time.
I would recommend getting the Stanley knife instead of this one, but if you dont like disposable blades this is a great option.
2: Marking

This is one of the best tools you can get as it has 2 main functions in 1 tool!
It can be used to mark your edges so you know where to punch your holes AND it can be used to bevel the edges of your leather.
For $8 its a great start and it will help you identify where you should spend some more money and get better tools. e.g on some Barry King edgers.
3: Hole Punching

I have used all kinds of pricking irons from $400 handmade ones to these cheapo stitching chisels and while I love the expensive ones which are better made, I still use my cheapo aliexpress 6mm ones nearly everyday.
What size should I get?
Any size will work but if you plan to do more bags and larger items I recommend getting the large 6mm ones. If you are planning to do more smaller items such as wallets then 3mm is is a great size.
Just remember the larger the gap the less stitching you have to do.

Wooden Mallet: $11
This is my mallet and not the same one as the link as I got this one second hand.
Any wooden, rubber or rawhide mallet will do. You just want avoid metal ones as they will destroy the rest of your tools. The cheapest i have found is a $5 rubber one from bunnings.
This mallet had an epoxy face and a leather face. I find the epoxy pretty useless but I like the leather face as it protects the tools, isn’t as loud when hammering and instead of ruining a hammer and having to sand it back I just peel off the leather and glue a new one on.
4: Stitching

Needles (I use size 3): $8
I have bought these needles multiple times and they are the right balance between thick/ strong and still being able to fit into small holes without to much strain.
The main difference between these needles and normal sewing needles is the point is blunted on the leather needles as you don’t need to pierce anything since the hole is already there. And they are stronger.

Waxed Nylon Thread: $20
I still use this thread as its cheap, strong and super available. Often it isn’t waxed very well but you can buy wax and wax it before use.
I typically use 0.8mm or 1mm thread flat waxed nylon thread in 260m reels
I buy mine from aliexpress or ebay so I wont post a link. But for a bit more money you can get 400m from birdsalls. They have a lot of other options too.
5 (Optional) Finishing the Item

Edge Slicker: $8
As you can see my edge slicker has gone through a lot of wear but it works better than it first did. So if yours isn’t fantastic at first, maybe give it a light sand to make sure its really smooth and then use it a tonne.
You can definitely make your own and if I did I would make the grooves deeper but for $8 you can’t really beat it.

Burnishing liquid- gum tracaganth: $21
This is what I use. As far as I know its a natural product and after 6 years of using it, it makes burnishing the edges of leather heaps easier, especially vegetable tanned leather.
Another option is toko pro which works great on veg tan and even on chrome tan leather.

Letter stamps: $30+
The stamp set pictures was my first and only stamp set for a long time and I still use it a lot even though I now have multiple sets of different stamps in different sizes and fonts.
The link is for a similar generic stamp set.
6: Leathers I use and where I get them from
Birdsalls (located in Taren Point, NSW)
Kangaroo Leather Glazed: I like the Black, Brandy and Cognac. (Glazed means it has a shiny surface)
Kangaroo Leather Natural: I buy the Natural one, and while I havnt’t bought it, the black and brandy look good.
Austanners (Located in Lara Victoria)
2.2mm Combination Tanned Leather: This is my most used leather and I love it. It has all the flexibility of chrome tanned leather and the toughness and natural feel of veg tanned full grain leather. I get the Cognac and black, but the green and mahogany look great too.
3.8mm Combination Tanned Leather: This is what I use for my belts, camera straps and dog collars. It’s similar to the 2.2mm but thicker.
Kangaroo Skins: I have bought a few of these in the natural, black, and saddle tan colours and while I like them and recommend them to beginners who dont want to spend a lot of money on leather, I dont buy them that often as they have a lot of scars, cuts and bumps.
Leather Recommendations:
Wallets: Kangaroo Skins
Bags & Pouches: 2.2mm Combination Tanned
Belts: 3.8mm Combination Tanned